Improving Communication and Confidence with Visual Snapshot Testing
This post is about how we adopted visual snapshot testing and what it did to our way of working — how it improved communication within the team and outside it, and boosted our confidence in changes we make.
I won’t dive into technical details, but I will provide some links to the tools we use. These tools are by no means the only tools available — there are many other options.
What is snapshot testing?
Snapshot testing is a testing technique that compares the program output with an “approved” output or a “gold master” (and therefore also known as approval testing or golden master testing). To implement it you need to:
- start by writing some code
- implement a test case for that code
- record the actual outcome of the test (a “snapshot”)
- inspect the outcome and approve it. From this moment, the snapshot is your baseline, or reference, for the next runs
- make changes to the code and re-run the test
- inspect the difference between the recorded reference and the actual outcome from this run
- either approve the difference and update the reference, or modify the code
The snapshot can be pretty much any representation of a state: a number; a serialized “state” object; a textual representation of visual components (think Jest); or even PNG screenshots of a visual component (like we will show later on).
This technique has a couple of characteristics. Let’s explore them.
Firstly, it’s pretty obvious that this approach does not go along with TDD. In TDD you need to write the test before writing any production code, but in this approach the test is defined by the production code.
On the other hand, this approach lends itself nicely in cases where describing the expected outcome is very hard. For example, if you want to describe how a visual component looks like, you can write a very detailed “specification” like:
Label A should be 300px wide, 10px from the left edge, and its contents should be the text “How do you feel?”.
TextBox B should be 500px wide, 30px right of Label A, and its contents should be “This is hell!”.
You could write such a test before writing any production code. But in my opinion it’s not feasible to define such a test accurately enough to capture all the visual details that a human perceives.
In contrast, you could just take a screenshot of the visual component and the “specification” becomes:
The component should look like the recorded screenshot.
Adopting Visual Snapshot Testing
My team is developing the MyKlarna website. It is a web application that our customers use to manage their credit account and purchases, and settle their payments to Klarna. We use React.JS and Redux, and our backend is written in Ruby.
Before adopting visual snapshot testing, this was roughly our way of working:
- A developer would make a change to the code (e.g. update CSS or some React component).
- The developer would test the change locally.
- The developer would submit the change to code-review.
- Other team members would then pull that branch, run it on their local machine and inspect the visual aspects of the change.
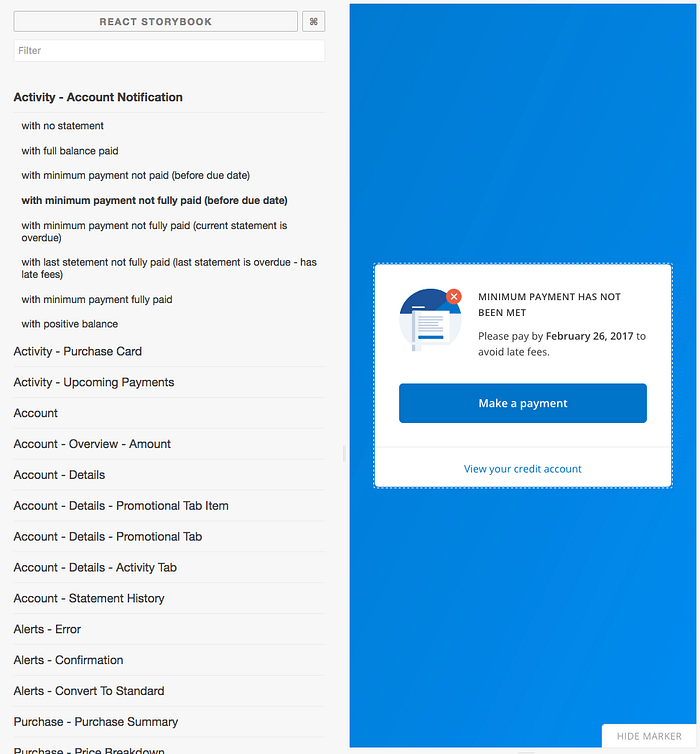
Obviously, this has tremendous cost for both the developer and the reviewer — simulating the scenario that finally displays the component we wanted to inspect is not trivial. For example, in order to see the component that notifies the user he still hasn’t met his minimum payment, you would need to simulate the following:
- Purchase an item
- Pay part of the pending debt
- Time travel past the “grace period” Klarna gives to its customers
Even just rendering a component that displays an error message would require, well, causing an error or simulating it somehow.
Of course we automated these scenarios, but the scripts would need to talk to a locally running server, and the entire scenario takes a couple of seconds — an eternity when you just want the browser to render the component you want to change.
In addition the developer would need to somehow communicate to the reviewers which scenarios to run in order to see the change.
Also consider that the product designer, the product owner, and other stakeholders are totally “out of the loop”. In order to sync them the developer would need to show them the changes scenario-by-scenario.
To summarize the pains:
- Replaying a scenario in order to render a component is a time consuming and tedious process.
- Relying on the developer to communicate the scenarios that need review is error-prone.
- Stakeholders are left “out of the loop” and see visual changes only when they are deployed.
React Storybook
The first step we took was starting to use React Storybook. Storybook is a “UI Development Environment”. It renders stories which the developer defines and allows the developer to visually inspect them even before they are integrated into the real application. You can think of stories like unit tests for visual components: you setup a scenario — the component props — and then execute the production code — render the component (if you are thinking “what about assertions”, then read on). A story looks like this:
Now the developer and the reviewer can simply run Storybook instead of running manual or automated scenarios on the real application.
To further ease the task of reviewing visual changes, we wanted to allow a reviewer to see the changes without pulling the branch and running Storybook. To accommodate that we integrated Storybook into our build pipeline — every push triggers a job that builds a static version of React Storybook; this is then uploaded to an S3 bucket; and finally the link to the bucket is reported to our BitBucket server. In short, every pull request has a direct link to its up-to-date Storybook. Magic.

This means the reviewer does not need to pull anything — everything is available within the pull request page. This also means that the product designer and product manager can now review the visual aspect of the change in their own time. We can also share that link with other stakeholders (e.g. customer support) who depend on our work.
Storyshots
While this was a huge improvement, the developer still needed to communicate which stories to review. When we integrated Storybook into our build pipeline we had about 60 stories. Consider that we had three layout breakpoints that change the layout (small mobile, mobile, and desktop) — and you end up with about 180 stories in the worst case. So of course the developer needs to specify which stories need review.
But what happens when the developer forgets to mention something? What happens when a small change in a stylesheet affects more than was intended? We needed a way to feel more confident.
One of the ways to increase confidence is using tests. And we had already done most of the it — we had already written stories that define exactly what to test. The only thing we needed was to add assertions.
Storyshots is a companion tool to Storybook that performs snapshot testing on the stories. The snapshot is generated by rendering the story into a textual representation which resembles JSX. When comparing a recorded snapshot with a current one it outputs a textual diff like in here.
This was close, but not exactly what we wanted. Inspecting a textual diff in order to understand visual changes is hard. So we forked Storyshots and modified the part that renders the stories — instead of rendering them to a textual representation, we let a browser render them and take a screenshot. Now our snapshots are actually screenshots.
Our Way of Working
So here is how we work after adopting visual regression testing:
A developer makes some changes to the application code.
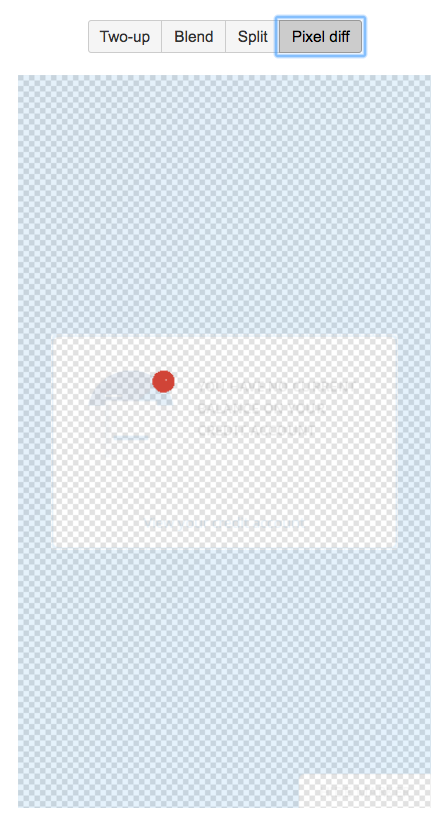
They then run Storyshots (our fork). If Storyshots finds a visual difference between a recorded snapshot and a current one it displays a diff as follows:

The developer then can decide whether to fix the code and re-run the test, or record the new snapshot as the reference.
After committing the code changes and the updated reference snapshots, and pushing, our build server runs the exact same tests — if any differences are found, the build is failed and the diff images are saved.
When the developer opens a pull request the reviewers can inspect the updated Storybook, as well as the updated reference snapshots. BitBucket does a wonderful job of displaying changes in images, so the reviewer can also see the following right inside the pull request:

Challenges and Future Work
We are very pleased with our new way of working — we feel more confident in making visual changes, we leave less to chance when it comes to reviewing, and we can easily include stakeholders in the process.
However, there is always room for improvement. Here are a couple of thoughts we have:
- Our fork of Storyshots uses the PhantomJS API to render the stories and take screenshots. We would like to use a more standard approach (like WebDriver) in order to be able to run against other browsers as well.
- There are other teams in Klarna who use different tools as “storybook” (like React Cosmos). However, our fork of Storyshots is tightly coupled with React Storybook. We would like to decouple them to allow other teams to enjoy this process.
- Taking screenshots is currently implemented in a very inefficient way.
How about you? What tools do you use? How does your workflow look like? If you’d like to share your thoughts drop us a line in the comments section!

